
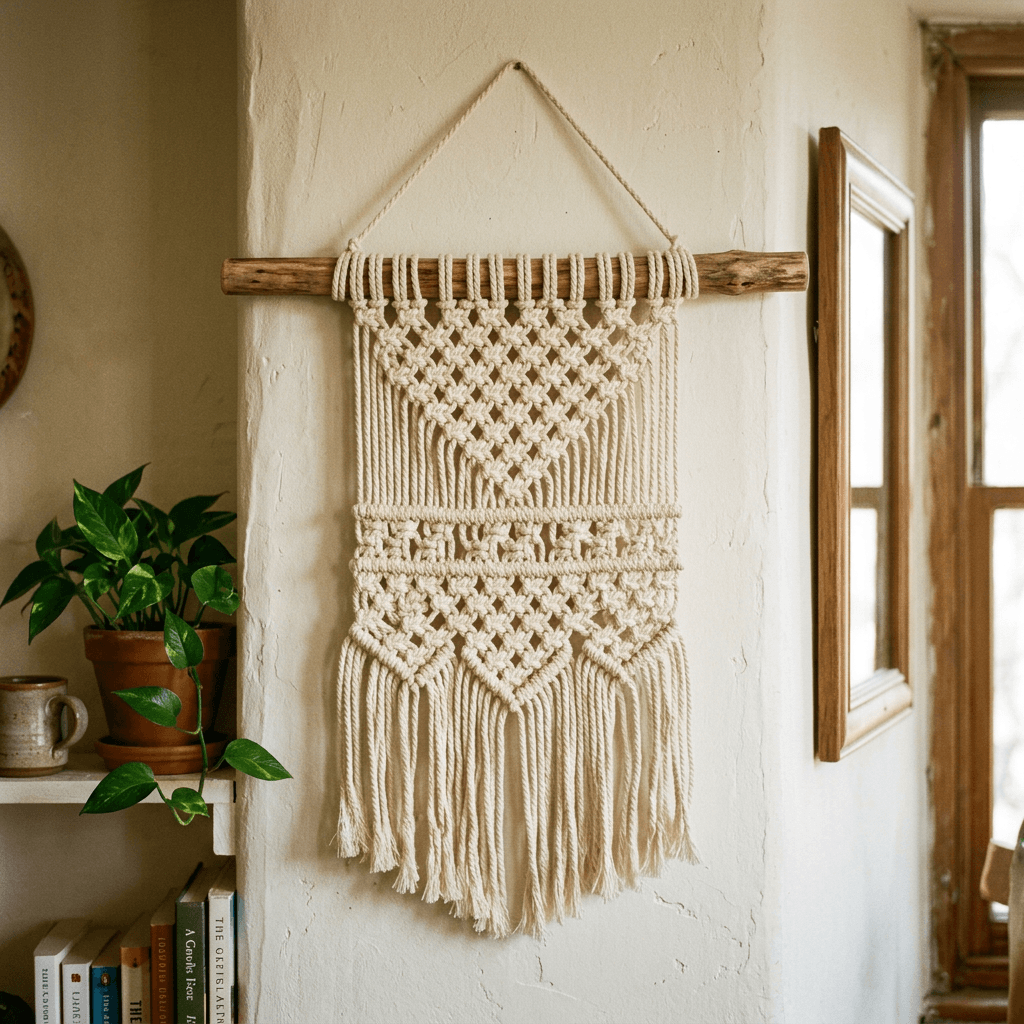
A complete beginner’s guide to macramé — starting with a beautiful wall hanging and growing into a full practice. Two knots are all you need to begin.
- 100% beginner-friendly
- Under $30 to start
- No sewing required
- 2–4 hrs first project
I came to macramé the way most people do, through a Pinterest rabbit hole at 11pm on a Wednesday. I saw a wall hanging above someone’s bed, all natural rope and fringe and warmth, and thought: that looks like something I could make.
Two weeks later, I had rope burns on my fingers, a wall hanging that was approximately 40% as good as the inspiration photo, and the most satisfied I had felt doing a craft in years. Macramé has a quality that’s hard to describe until you’ve experienced it…the meditative rhythm of tying the same knot over and over, the way a piece grows from bare strands into something textural and beautiful, the physical satisfaction of working with your hands on something that fights back just a little.
This guide starts where you should: a simple wall hanging, two knots, one afternoon. From there, I’ll show you how the same skills unlock plant hangers, keychains, table runners, coasters, and more. Everything here is genuinely beginner-friendly. No experience. No fancy equipment. Just rope, a dowel, and your hands.
What You’ll Need
Your starter kit —
simple and affordable
You can get everything for your first wall hanging for under $30. Here’s exactly what to buy and why.
Macramé Cord — your most important choice
For beginners, 3mm single-strand twisted cotton rope is the sweet spot. It’s soft enough to work with your bare hands without discomfort, holds knots well, and the natural cotton look is classic and beautiful. A 500-foot spool is enough for 2–3 wall hangings and costs about $15–20 on Amazon. Avoid nylon (too slippery) and jute (too rough and bristly to handle for hours).
→ Bochiknot 3mm Natural Cotton Macramé Cord
Wooden Dowel
A 12–14 inch wooden dowel, ¾ inch diameter. This is what you hang your work from. You can also use a driftwood branch, a copper pipe, or a thick twig from your yard. Sand smooth if rough.
→ Craft wood dowel rods, 12-pack
Scissors
Sharp fabric scissors or craft scissors. You’ll be cutting cord constantly — dull scissors make every cut harder and fray the rope ends. Keep a dedicated pair for fiber crafts only.
Measuring Tape
For measuring cord lengths accurately. You’ll need to cut cords to specific lengths before you start — for a wall hanging, you’ll cut cords 4–5× the finished length you want.
→ Any standard tape measure works
Wooden Comb or Pet Slicker Brush
For fringing — the process of unraveling the rope ends at the bottom of your piece into soft, fluffy fringe. A wide-tooth comb or a pet brush works perfectly and takes fringe from scraggly to luxurious.
→ Wide-tooth detangling comb · under $6
Hanging Rail or Hook
A command hook, S-hook over a door, or a curtain rod to hang your work from while you knot. You need your piece suspended at eye level to see what you’re working on and tie knots comfortably without hunching.
→ Over-door hook or command strip hook
Optional extras that make a real difference
T-pins or foam board — pin your work to a foam board on the wall for hands-free positioning while you knot. Masking tape — wrap the cut end of cord before cutting to prevent fraying mid-project. Colored cord — once you’re comfortable, introducing a second color of cord to your natural cotton is an easy upgrade with stunning results. Feathers or dried flowers — tuck between strands for a bohemian layered look.
→ Foam board pinboard · Scotch masking tape · accent cord in blush or sage
Material Guide
Choosing the right cord
Cord type and thickness changes how your piece looks, feels, and behaves. Here’s a quick reference for picking the right material for each project type.
| Cord Type | Best For | Feel & Look | Beginner? |
|---|---|---|---|
| 3mm Single-Strand Twisted Cotton My top pick | Wall hangings, plant hangers, keychains — everything. The universal beginner cord. | Soft, flexible, natural cream/white. Fringe brushes out beautifully. Takes dye well. | ✅ Yes — ideal starting point |
| 5mm Single-Strand Twisted Cotton Great choice | Larger wall hangings, statement pieces, plant hangers for heavy pots. | Chunkier, more dramatic knot texture. Faster to work with on large pieces. | ✅ Yes — easier to see knots |
| 3-Ply Braided Cotton Solid option | Bags, baskets, anything that needs to hold shape and weight. | Stiffer, structured. Knots sit tight and precise. Less soft fringe. | ⚠ Moderate — slightly harder to knot |
| 2mm Cotton String Delicate work | Keychains, mini hangings, jewelry, fine detail work. | Fine and delicate. Beautiful for small intricate work. Harder to see your knots. | ⚠ Best for second project |
| Jute Experienced | Garden projects, rustic outdoor pieces, coastal decor. | Rough, bristly. Earthy brown color. Extended knotting is hard on bare hands. | ❌ Too rough for long sessions |
| Nylon / Polyester Specific use | Outdoor plant hangers, functional items needing water resistance. | Slippery — knots tend to loosen. Comes in vivid colors. Not the classic macramé look. | ❌ Too slippery for beginners |
The Foundation
The essential knots —
everything starts here
You only need to master two knots to complete your first wall hanging. Everything else is repetition and pattern. Click each category to explore.Foundation KnotsPattern KnotsDecorative Knots
★☆☆ Beginner · 30 seconds to learn
The Lark’s Head Knot

Your very first knot — the one you use to attach every single cord to your dowel. Fold a cord in half, place the loop over the dowel, pull both tail ends through the loop, and tighten. That’s it.
- Fold your cord exactly in half — this creates a loop at the top
- Place the folded loop over your dowel from front to back
- Pull both tail ends of the cord up through the loop
- Pull both ends down firmly to tighten against the dowel
★★☆ Easy · The most important knot in macramé
The Square Knot

The workhorse of macramé. Four strands: two outer “working cords” and two inner “filler cords” that don’t move. The square knot is two half-hitches tied in opposite directions — left over right, then right over left.
- Hold 4 strands. Name them L, 2, 3, R from left to right
- Bring L over 2 and 3, then under R — form a “4” shape on the left
- Bring R up through the loop on the left side, pull both sides tight
- Now mirror: bring R over 2 and 3, under L, then bring L up through the loop on the right
- Pull both sides evenly tight — one complete square knot is done
Step-by-Step Projects
Six things you can
make right now
Each project builds on the last. Start with #1, and by the time you reach #6, you’ll have a full macramé practice. Click “View steps” on any project to expand the instructions.
🖼️
Beginner
Simple Wall Hanging
Your first and most important project. A small wall hanging (10″ wide, 24″ long including fringe) uses nothing but lark’s head knots, square knots, and fringing. Looks beautiful above a desk, bed, or in a gallery wall. Takes 2–4 hours for your first one, 90 minutes by your third.
3mm cotton cord · 200ft12″ wooden dowel2–4 hours~$18 materialsView step-by-step+
Beginner

Plant Hanger
Four-strand spiral hangers for small to medium pots. Rounds + gathering knots create the basket. Your second project — completed skills transfer directly.
5mm cord · 100ftS-hook or ring1–2 hoursView step-by-step+
Beginner

Macramé Keychain
The fastest way to give someone a handmade gift. 30–45 minutes, uses almost no cord. Perfect for practicing new knots without committing to a large project.
2mm cord · 10ftSplit key ring30–45 minView step-by-step+
Intermediate

Woven Coasters
Round coasters made with dense square knots or a simple weave. A set of four makes a wonderful housewarming gift and teaches you to work in tight circular patterns.
3mm cotton · 50ft per setFoam board + pins1 hr per coasterView step-by-step+
Intermediate

Table Runner
A long, narrow macramé runner for dining or coffee tables. Simple alternating square knots with fringe at both ends. A striking centerpiece that looks like artisan work.
5mm cord · 400ftTemporary rail / board4–6 hoursView step-by-step+
Advanced Beginner

Statement Wall Hanging
A large-scale, multi-technique piece combining square knots, half hitches for diagonal sections, berry knots as focal points, and layered fringe. The piece you frame your skills around.
3mm + 5mm cotton24″ dowel8–12 hours~$35 materialsView step-by-step+
Hard-Won Wisdom

Tips that will save you
hours of frustration
📏The 4× Rule
Cut your cords 4–5 times the finished length you want. Beginners always run short. When in doubt, go longer — you can always trim, but you can’t add back what you’ve cut.
👁️Hang While You Work
Always work on your piece while it’s hanging, not lying flat. Gravity is your friend — it shows you where tension is uneven and helps knots sit naturally in the right position.
✂️Tape Before You Cut
Wrap masking tape around the cord before cutting at the tape’s midpoint. This prevents fraying during your entire project and makes the cord end much easier to thread through knots.
🔢Number Your Groups
When working on a complex piece, lightly mark each group of 4 strands with a small piece of colored tape at the top. Losing track of which strand belongs to which group is a beginner trap.
💧Water Fixes Tension
If your knots look uneven or bunched, lightly mist the finished piece with water and gently stretch and smooth the knots with your fingers. Let it dry flat or hanging — it’ll even out beautifully.
🐛Worm Your Ends
Finishing loose cord ends neatly is called “worming in.” Thread the end onto a blunt tapestry needle and weave it back and forth through nearby knots on the back of the piece. Invisible, secure, professional.
📦Store on a Roll
Wrap unused cord around a cardboard tube rather than leaving it loose. Tangled cord is the enemy of creative flow — five minutes of proper storage saves thirty minutes of untangling later.
🎨Dye After Knotting
Want an ombre or dip-dyed look? Knot your piece in natural cotton first, then dip the bottom third or half into fabric dye diluted in warm water. The cotton takes dye beautifully and the result is stunning.
When It Goes Wrong
Common problems
& their fixes
“My knots are sliding up and down and won’t stay in place”
You need more tension on your filler cords. Hold the two center (filler) cords taut and straight downward with one hand while you tie the working cords around them with the other. The fillers must stay still — only the working cords move. If you’re releasing the fillers while knotting, everything shifts.
“My piece is getting narrower as I go down”
You’re pulling the outer working cords inward with each row. After each square knot, the working cords should return to the outer edges of your group — they should point outward, not angle inward. Check your width against a ruler after every few rows and gently ease strands outward if they’ve crept in.
“My square knots look twisted and lumpy, not flat”
The most common cause is tying both halves of the square knot in the same direction instead of mirroring them. First half: left over right. Second half: right over left. If you do left-over-right twice, you get a granny knot — it twists and looks messy. Practice the mirroring until it becomes automatic.
“I ran out of cord mid-project”
It happens to everyone. Cut a new piece of cord to the length you need. Join it by tying a square knot around the old, nearly-spent cord. Leave a 2-inch tail on the new cord, complete your row, then weave both tails into the back of the work with a blunt needle. The join becomes invisible.
“My fringe looks scraggly and thin, not fluffy”
The comb technique matters here. Work in very small sections — 2–3 strands at a time — and brush from the bottom tip upward toward the knot in short strokes. Work methodically and don’t rush. A pet slicker brush works even better than a comb for maximum fluff. Misting the fringe lightly with water before brushing also helps.
“My plant hanger won’t hang level — one side is lower”
Your gathering knot or final knot groups are at slightly different heights on each side. Hang the piece and adjust by hand while the cord is workable — loosen the lower side’s knots slightly and slide them up, tighten the higher side’s knots. Pot hangers are very forgiving — even 1cm adjustments make a level difference.
Tie your first knot.
The rest follows.
What I love about macramé — and what I couldn’t have predicted before I started — is that it gives you exactly as much as you put into it. A slow, meditative afternoon yields a piece that carries that quiet in its knots. A focused creative session yields something you’ll look at and think: I made that. With rope and my two hands.
The wall hanging you make this weekend will not be perfect. The tension will be slightly uneven in places. One knot will sit a little crooked. The fringe will be slightly fuller on one side. Put it on your wall anyway. Because the imperfections are the record of you learning — and that’s exactly what handmade is supposed to look like.
Start with the lark’s head knot. Then the square knot. Then tie them in rows until you have something you can call a wall hanging. Then brush out the fringe, hang it up, and look at it for a moment. That thing exists because you made it. There was no app for that. No algorithm. Just rope, and patience, and your hands.
That’s worth everything.
Happy knotting.

This post contains affiliate links. Purchases through my links earn me a small commission at no extra cost to you — it keeps the rope stocked and the studio running. Thank you.
Leave a Reply